Check out my Etsy shop!

Showing posts with label paint transformation. Show all posts

Sunday, March 11, 2012

the magic of spray paint

I have decorated these pictures in my dining room many times.  I have always liked these pictures but for some reason I have wanted to put something over them.  You may remember that I wrapped them with muslin and made a Halloween silhouette out of them for the fall. 

for Christmas I wrapped them like gifts on the wall. I have decided it was not the pictures that I so much dislike but the color of the mat that is framing the picture.  I have had these pictures for quite awhile and decided that maybe I should change the mat.  Getting new mats for your pictures can be quite expensive.  I thought maybe I could just paint the existing mat. So, I did!

It is hard to get a photo with the glass.  To paint the mat I had to take the back of the picture apart and separate the print from the mat.  Once I had the mat separated I just used some spray paint and painted the mat.  I then decided that maybe I should paint the frames, so, I painted the frames a creamy white. Once they were dry I put the print, mat and frame back together.

I really like how it turned out because it matches the room now!  Maybe I won't be covering up these pictures all of the time.

They are quite large pictures and it would have been quite expensive to replace them

You can change the look of your pictures, without breaking the bank and look what just a little paint can do!

Friday, April 1, 2011

Polka dots and Butterflies

(" Oh, no, You have a paint brush in your hand.")
These are the words I have heard from Mr. Jones many times in our married life.
I heard them again this last week. Mr. Jones is someone who likes things to stay where they are and I think he would be content to have the original paint still on the walls for 30 years. I think having things stay as they were keeps him grounded. I am a different story, I am continually changing furniture arrangements, paint color,  finding new ways to do things etc. Mr. Jones always likes the finished project but he usually says, "I like it the way it is." He said that same statement about the bathroom below.  It has been about 5 or 6 years since I painted it last and I don't know what it is but I start getting a thought about painting and I can't get it out of my head! Besides it's just a can of paint and if you don't like it you can always change it.  Well, it was time for a change!
I had done a glazed treatment over these yellow walls.

It is a very small guest bathroom so it won't take long to paint.

These use to be an oak color and I painted them red when I went with the yellow mustard color.

I started by cutting in all of the edges. When we moved into this house there was a small medicine cabinet where the big hole in the wall is and I bought a large mirror and just put it over the hole. (Now, you know my secrets!)

Yep, just a hole in the wall.

Almost finished with the cutting in. Then I had to paint the ceiling, I painted it an ivory color because the yellow ceiling just wasn't doing it for me.

Of, course if you change the paint color then you need to change the accessories. I have these prints that I decided to Mod Podge to some canvas. This was easy you just find a print and cut it to the size of your canvas and start gluing it to the canvas.  After the Mod Podge dries find a color to paint the sides and kind of smudge it up to the top.

I needed some new towels to match, so I found some fabric that would match the paint and made a couple of gathered ruffles to attach to the bottom. I cut my fabric 4 inches wide folded it in half. pressed it with an iron and ran a gathering stitch along the unfinished edge.

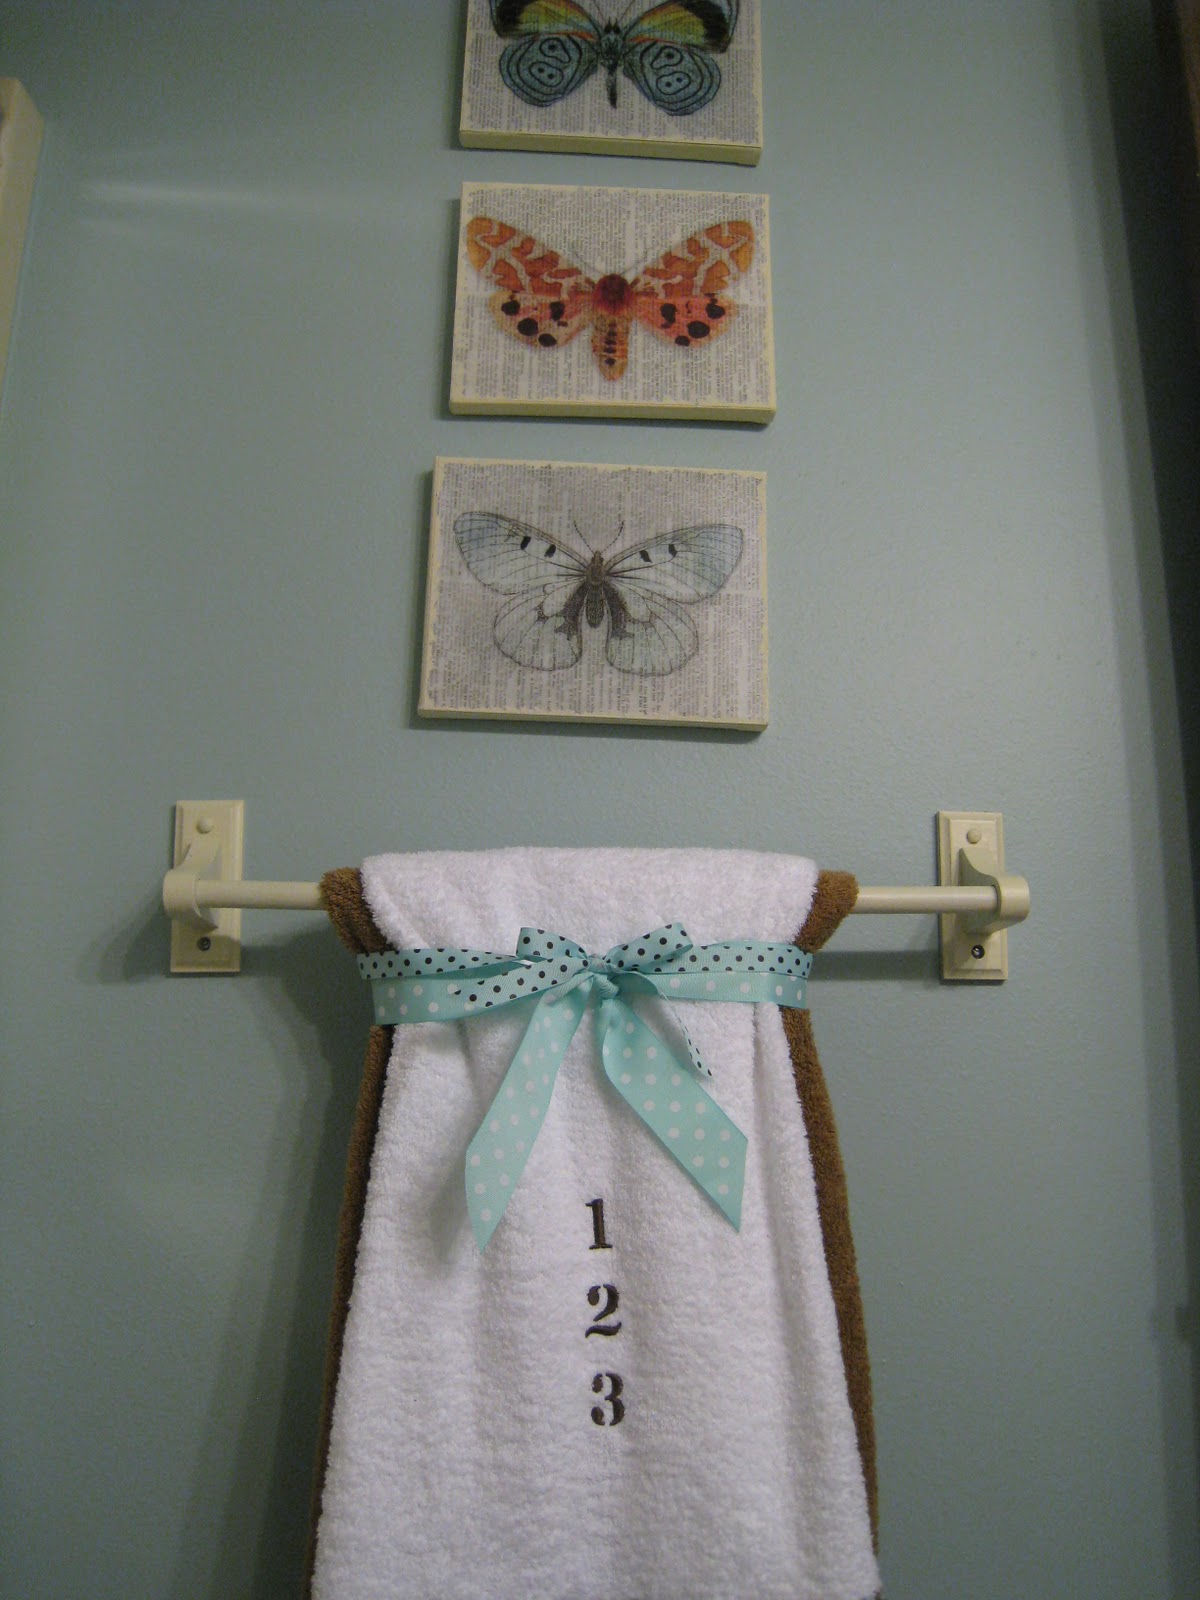
I used my embroidery machine to embroider the numbers on the towel.

Pinned into place and sewed away.

Added some more polka dots with the ribbon and the towel was finished!
Oh, and I decided to paint the towel bar instead of getting a new one because the holes in the wall were already the right size for this towel bar.

I did add this top stitch, if you can see it, on the top of the ruffle to keep the ruffle down and to get rid of the raw edges of the fabric on the other side of the ruffle.

I then made a hand towel and added the same size ruffle but decided to sew the ruffle down the middle so I finished the raw edge on this one with a Serge rolled hem.

Added the 1,2,3 and I had a matching set.

Now if you remember from the before picture I had this same towel rack and I really didn't want to buy all new towels so I added a towel cover to the towels I already had. I bought some white terry cloth fabric and added a border of brown and blue fabric and embroidered the numbers on the towel covers and then just wrapped them around the towels I already had.


I added a washcloth banner to the wall above the shower.

A new towel hook for the hand towel.

Painted the cabinets a dark brown. I did a light coat because I kind of liked the red showing through the paint.

Almost looks like a dark cherry.

Here is a close up of the towel covers.

Added some more polka dots to the wash cloths.

And some more polka dots! I just used some ribbon to attach the banner to the wall.

Here are my butterfly prints that are on an old dictionary page.

See how the paint from the sides of the canvas are smudged up onto the top.


Wow, I am exhausted! I think that is why I only get the paint bug every 5-6 years.
I love the new color though and it was all worth it!

Saturday, February 12, 2011

Painting the accent wall

The accent paint for the back wall in my bedroom that I chose, was this paint from Martha Stewart Living.
River Mist was the color that looked the best with the wall color that I already had and it looked great with the carpet and the wood that I have in the room.

I didn't realize that on the back of the chip was some colors that go well with this paint and even suggestions for the ceiling and accent walls. After I had finished painting I saw this on the back and had to smile because the accent was very close to my carpet color! Yeah, I knew it looked good!

While I was at Home Depot waiting for the paint to be mixed I was looking around and saw this sign above the paint counter that said, " If our associate fails to suggest some paint accessories to go with your paint, you will get this free $25 paint kit to go with your paint."  I thought, hm mm, I wonder if he will ask me?  When he finished mixing the paint he handed me a couple of wooden sticks to stir my paint.  I told him thanks and turned to walk away when I remembered the sign, and asked, "Does this mean I get a free Paint Kit with this paint."  The look on his face kind of made me feel bad because he immediately replied, "Oh, man, I forgot to ask you, and in the next breath said,"I'm going to lose my job!"  He then quickly replied, "not really" but it wasn't probably a good thing that he had to get his manager to get the paint kit and put the sticker on the kit that said that it was free.
But I did get the rollers, tray, paintbrush and everything else for free!!!


I hurried home and was ready to  paint!  I did get interrupted several times that night but by 10:00 pm I had it finished!  I started taping everything off, but then decided it was just easier to use my angled brush to cut in the ceiling, corners, base board and windows. I then rolled the rest and it went very fast from there.

I loved it when I was finished. The blue really makes those Anthro mirrors pop!

It brings out the blue accent in the pillows.

The blue and pale cream yellow look great together.


I even got motivated and cleaned all of the old magazines out from under my bed. (I should have taken a picture before, there was a bunch under there!)

Even the lemon trees on the side tables looked better.

Here is a picture with a flash, it is hard to see in the day when all of the sun is shining through the windows.

I changed the arrangement of my chairs because the TV is on the one side of the room so I made a little seating arrangement to watch TV and then had to put my old suitcases on the other side to balance the room a little.

I moved this into the room and it just fit in the little alcove.

Here is the two paint colors side by side.

Aaaaah, it really pulls everything all together.

Here is the seating arrangement in for TV viewing.
If you want to add a little pop to a room, try and accent color on one wall.  It doesn't take you as long as painting the whole room and besides, if you don't like it, you can just paint it again.  That's what I love about painting, just a can of paint really makes a difference in a room!

LinkWithin

Related Posts with Thumbnails