Check out my Etsy shop!

Saturday, December 18, 2010

Wrapping it up!

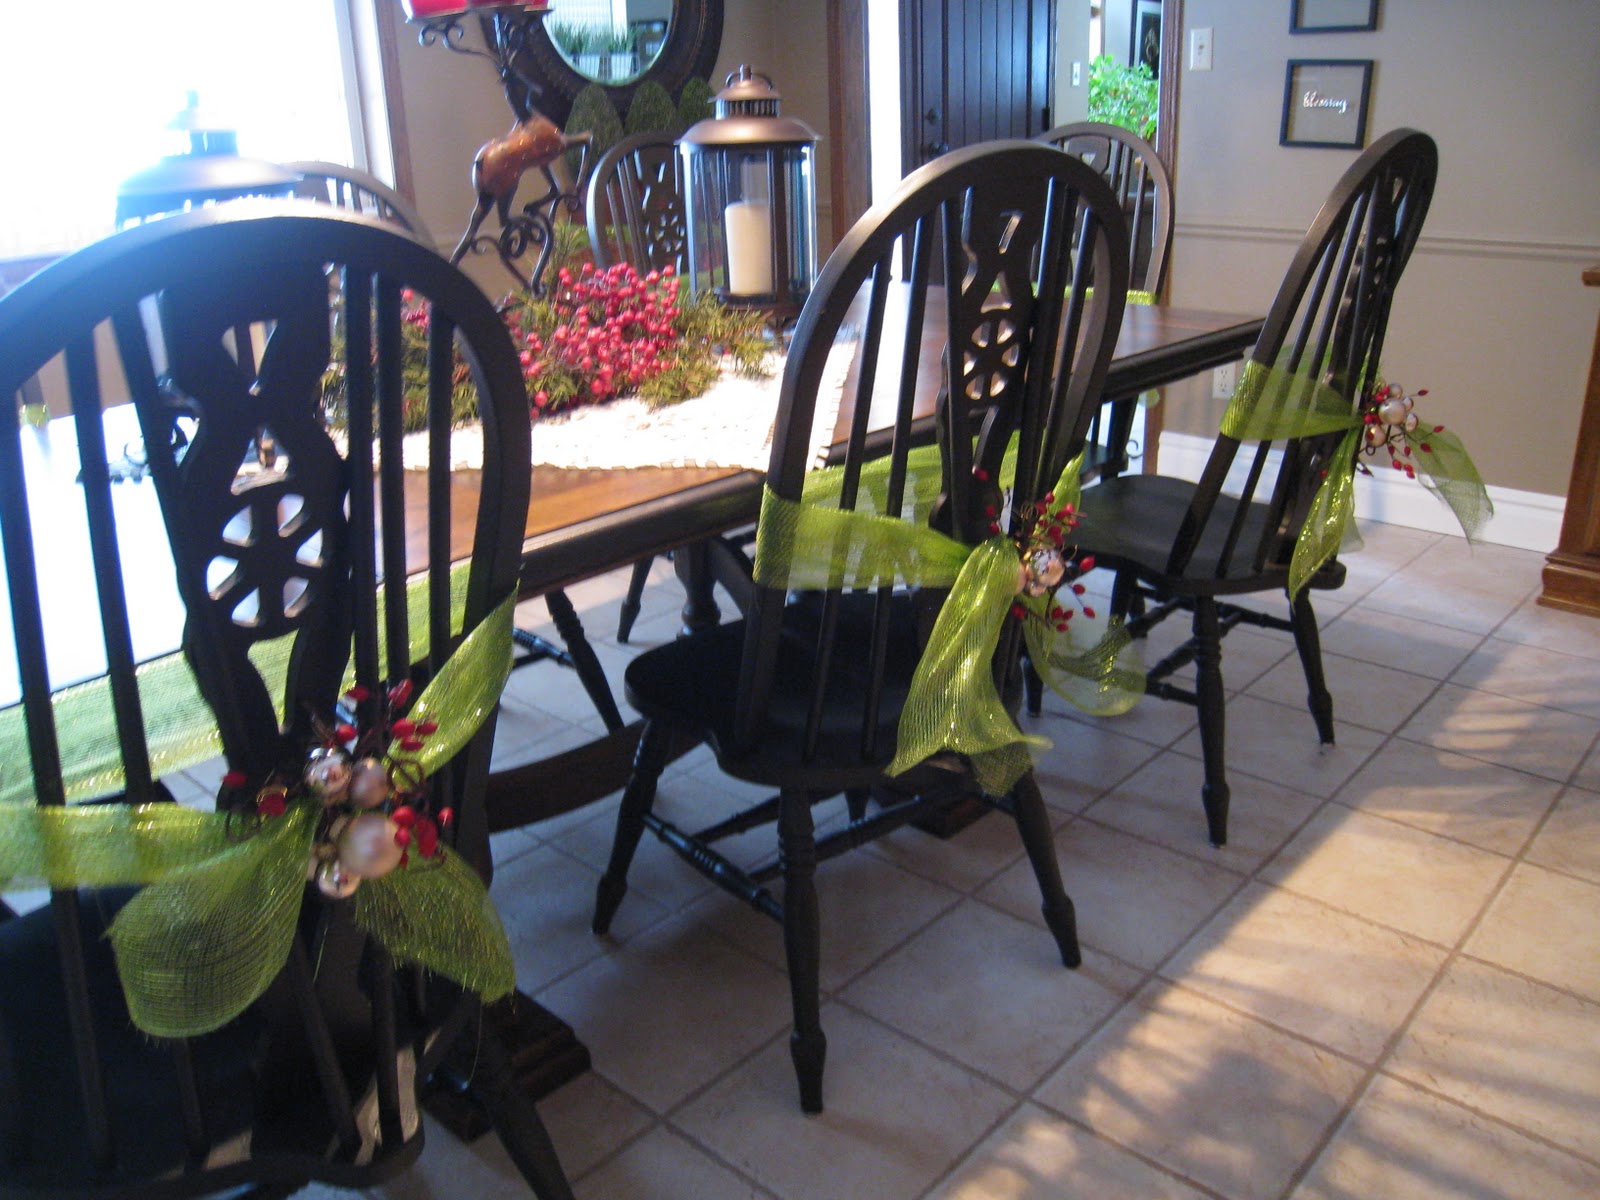
I have been wrapping gifts this week and when I was through, I thought, hm mm, maybe those chairs in the dining room could use a little wrapping.  I had bought this wide mesh a couple of months ago, because I loved the color and thought, I bet you could do something fun with this! I tried the wide wrap first, and I didn't like it so I took it off and cut the mesh in half.  Much better!
I then added some red berried and some sparkly ornaments.

I attached the ornaments on some gold wire that I had and put about 5 per wire and then wired it around the bow knot.

Doesn't that just add some festiveness to my table?

I know I said that I was through decorating but sometimes I just can't help myself. (I know, I need help.)

I had some of the mesh left over so I added some to the potted topiary in the corner.  I had already put a string of lights in the bottom and putting the mesh over the top just made it better.

I added another nativity and put it in the center of a crystal ice wreath and just added lights around the wreath.

It kind of looks cold and I hope baby Jesus stays warm, but the effect looks nice.

I added a garland to the stair railing and little red rice lights. I added just a few pinecones and metal stars, and it finished it off just right.


Hope you are having a great day and wrapping up all of the rest of your projects that you have left!

Saturday, December 11, 2010

Let it snow, let it snow, let it snow!

 I have been working on my neighbor and friends gifts today and I wanted to show you how cute they turned out.  I had seen this idea last year and thought how cute and easy they would be.  So I will share how I made these.

First you will need some 2 liter bottles of pop, a white tube sock, a black small stocking cap, some felt, and some buttons.

Pull the tube sock over the bottle leaving the open top at the top, (so you can still pour out your drink without disturbing the snowman.)  Roll down the sock around the neck of the bottle.
Put the hat over the top of the bottle and use buttons for the eyes and down the front. Cut some strips of felt and fringe the edges.  I actually tied on the scarf first so I would know where to put the eyes and the buttons down the front.

For the nose I used a rolled piece of orange felt.  

Stuck it in the middle of his face.

The felt was about 3/4 of an inch wide by 6 inches long and I cut it into two pieces making a long triangle and start rolling from the wide end and hot glue into place.

Glue the buttons on, add some cute little pink paint circles for his cheeks and you have a cute snowman!

You can use this tag to attach to your snowman, just click on the above picture and "save as" somewhere on your computer.  It was quick and easy and a great gift idea!
Bring on the snow!!

Saturday, December 4, 2010

Christmas decorating...

I love Christmas decorating but it seems that this year I just don't have the desire to put up quite so many trees.  It may be because my husband and I are flying to my daughter's on Christmas day and will be gone for that whole week. I think that must be it, because I will have all of that work when I get back!
I usually put up a tree down stairs.
A tree in the living room.
Three trees in the dining room, and sometimes I have put a small tree in each of the bedrooms!

I think that this is maybe what I should focus on more this year instead of putting up so many trees.


I have done some quick and easy projects though. I was up to the barn and saw this old sled, it was used and reused when my kids were little. So I thought why not reuse it again and add some old skates to really make me reminisce. I have had a hard time getting rid of the skates because they bring so many memories of when we had a skating pond in the park where we used to live and my kids loved to go and skate there.

Add a bow and some greenery and a pop of red and that was pretty easy!

I have put up the Santa's on my mantel. This is a fun project as well. Collect pieces of drift wood and get your dremel tool out and carve a little on the wood and then add some simple painting  and you  have a darling Santa. (Warning, you will not be able to make the same one twice! and you will just want to keep making more!)

See, this one looks a little tipsy!

and he looks quite stately!

My dining room table.

The downstairs mantel.


This is the tree that I decided to put up, it is where we spend most of the time.


So, I think it is okay to simplify my life a little this year, no big parties planned and no out of town guests.  I don't think I could go without decorating a little bit though, so hope all of your decorating is going well too!


Saturday, November 27, 2010

Belsnickles!

A few years ago, I made a lot of these little men, (they paid for my kids' Christmas for quite a few years) and this last summer my daughter asked if I would make one for her Christmas gift. I haven't made any for awhile because they are a lot of work and they are not a day project.  My daughter came to visit for Thanksgiving and so I have been busy trying to get this Belsnickle finished so she could take it home with her.
So, what is a Belsnickle you ask? These little men originated in Germany and they take their name from
Pelz-Nickolaus which means "St. Nicholas in fur."
In the German communities, usually a neighborhood farmer would dress up with furs, pelts and perhaps a mask made of papier -mache and chicken wire.  Then he'd make the rounds of the local houses rattling chains and throwing pebbles at the windows.  He carried goodies for the children in his sack, but he also carried switches and threatened to smack any children who hadn't been good.


These are inspired from the German legend of Belsnickles.


He has his bundle of switches.


I make the faces from clay and sculpt and paint each face. I have not been able to make the same little man twice, but that is half the fun, deciding what kind of wrinkly face each one should have.


This one has quite the wrinkles. I have made some of them with the beard from horse hair, but this one's beard and hair was made from wool.


His coat is made from real leather and fur. (Don't worry it has been up cycled.)

His little boots are made from leather and eyelets.

His belt was made from a tiny buckle. His clothes from up cycled wool and sweaters.


 I try and find little miniature toys and trinkets for him to carry.


Yes, they are a lot of work, but very rewarding when you get to see the finished project. I'm hoping my daughter will love them as much as I do and you know it isn't really Christmas without a Belsnickle in the house!

Tuesday, November 23, 2010

It is almost here!

I thought I would show you some of the last minute projects we have been doing for Thanksgiving!
We had a dinner on Monday night with some of my family who will be going to the other side of their families.  We decided to have a pasta night and then we made these darling pumpkins. They are easy peasy to make!
If you want to make one you will need to find some fabric and cut out any size circle that you want, the bigger the circle the bigger the pumpkin.  Then sew a gathering stitch around the edge, if you don't want to sew with the machine you can do a running stitch with a needle and thread. Then gather the fabric all around the edge and before making it tight, fill it with dried beans.  I did find that I needed to finish it with a needle and thread to make it tight.  Then go and find a pumpkin stem from all of those pumpkins you have lying around.  Pop off the stem and I decided to spray paint mine copper.  I then cut out some felt leaves and had some wire wrapped raffia to make the curly ques.

They were fast to make!

I will have to make some more of these next year because I can now see all kinds of possibilities.


For the special pasta dinner I made these cute little turkeys that I had see on KSL studio 5. They are made from those little stretchy gloves! These are super fast as well. Just put the one glove inside of the other and stuff the thumbs inside of each other, (this makes the head).  Then stuff the rest inside to make the body.  Fold the cuffs up inside so there is a flat place to make them stand upright.  Add a little cone beak from felt and I used a sequin and a bead for the eyes.  The gobbler is made from a strip of pinking sheared red felt.


Then tie a piece of ribbon around the fingers to make the feathers!
The stripes turned out cute!


Very Easy Peasy!
I then had found some 60 inch white fabric that I made a table cloth with. I wanted to start the tradition of writing on the cloth each year and everyone will sign it and say what they are thankful for! I can't wait until the cloth is totally full!


I think I will like this tradition!
On last Tuesday we had a fun activity with the Youth in our area and we had them all bring a treat to share. We then made up special plates with all kinds of treats and distributed them with this card on the top and some copies of the card to share with others.  The youth loved it and had fun ringing the doorbell and running so the recipient  would not see who it was that brought the yummy treat!  If you want to do this just click on the picture and save the picture to a place on your computer and then make your own copies.


Hope you all have a very fun Thanksgiving and a very thankful holiday!

LinkWithin

Related Posts with Thumbnails