


Well, I finally did it. I have wanted to do something different with the cabinets since we moved in. The thing that was stopping me was Mr. Jones and his fixation on covering perfectly fine wood with paint. I know I used to strip furniture and wondered why someone would paint over perfectly beautiful wood. It wasn't necessarily the wood that bothered me so much but the scale of the cabinets in this kitchen. The ceilings are 10 feet tall and the cabinets did not seem to match the scale of this room. In order to do what I needed to do I needed to paint or try and do a different stain color. (because the color of the stain was not quite what I wanted either.)

I found a Rustoleum kitchen cabinet transformation kit and decided that maybe that would work. On the picture on the box of the kit it showed several different options to glaze to get a certain color. In the beginning that was what I was planning on doing. Glazing the cabinets.

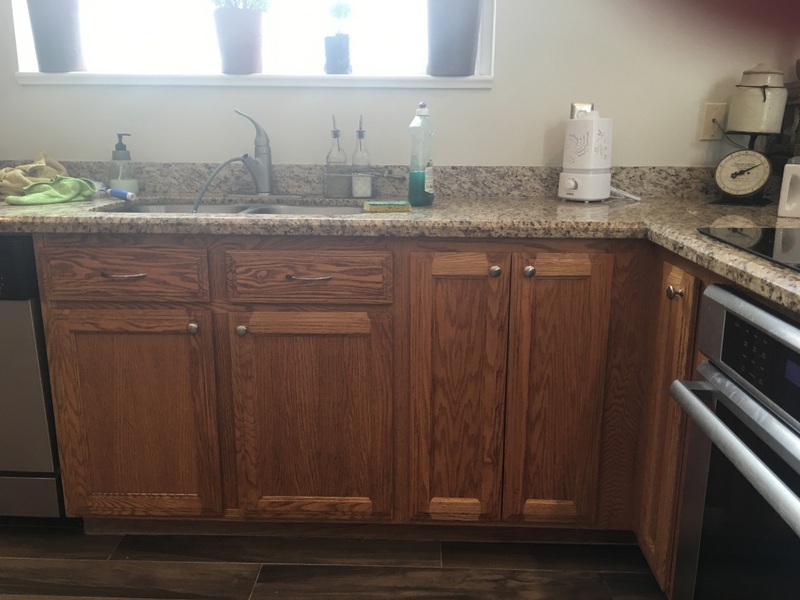
This is the pantry by the fridge.
I chose the Rustoleum kit because it said you didn't need to sand and I really wasn't in the mood to sand so I bought the kit. The first step is removing the hardware and the hinges and doors form the cabinets. This is tedious, I won't lie but it is so worth getting a good finish on your cabinets. The next step was using a deglosser, scrubbing the doors and the cabinets and then rinsing them with clean water and drying them. The next step is the bonding coat. It said to use 2 coats so if you are doing both sides of the cabinet doors then you will put 2 coats on each side. I recommend this because it just looks better. I don't usually do the inside of the cabinets, I use the green frog tape and tape everything off that you don't want painted. (this takes a while too but makes the job so much easier.)
I decided to paint a section at a time instead of doing all of the cabinets at once. The reason for this was because I didn't have enough tables inside to put all of the cabinet fronts on. When I have painted my other kitchen cabinets, the weather is a little warmer and I set up tables in the garage. This time of year it is cold and I wanted them to dry before next year.
Believe it or not this is the fourth kitchen that I have painted in the homes we have lived in. All of the kitchens have had oak cabinets and I have painted them some form of white. This was the last one I painted in the Cub river home.
I want you to remember this picture because of the window. Sorry I didn't get a picture of the whole window. But below is what the window looked like in December.


This is after 2 coats of the bond coat, you can see the green tape on the floor. After this bond coat you then apply the glaze but when I glazed the wood, I kind of had a melt down because it was not what I wanted at all and it just made the cabinets look muddy and dirty. Yes, the grain of the wood showed through but it made the cabinets look very old. (sorry I didn't take a picture of this part.) After some discussion I decided to go with what I wanted all a long, another white kitchen but not with the bright white cabinets. I made a trip to Ace and found some Valspar paint with the perfect light gray. The man at the paint counter was so nice and mixed the perfect color. It actually was a Benjamin Moore paint color and it was the perfect gray but I wanted it lighter than on the swatch so he only put 50% of the color in and in was perfect.

I went home and started painting over the glaze.

Okay this is the part that I think totally makes the kitchen look like what I wanted. Mr. Jones is amazing and I told him I wanted a wide crown molding on the top of the cabinets. I got the idea from Pinterest. Here is my inspiration.http://theletteredcottage.net/guest-post-by-mr-lettered-cottage/

So Mr. Jones helped me find the crown molding and built this on top of the cabinet. We didn't do it exactly like the Pinterest idea. ( he did it better! He used a brad nailer and didn't have to worry about glue and tape and it looks fantastic!) As you notice in these picture, I don't take every thing out of my cabinets. I wasn't painting the inside so I just left everything in. After doing each section of the kitchen I then painted a top sealer coat to the painted cabinets. In all I did 4 coats of paint and one coat of the sealer. (That's a lot of flipping the cabinet doors over to paint. Remember to always end with the cabinets face up for your last coat of the day.)
After a week of living in disarray I finally was able to put the hardware back on and Mr. Jones is a perfectionist at putting the hinges back on the doors.
Here it is!!

I love it! and if you notice, I had another inspiration, (I think Mr. Jones is hating my inspirations.) The window above the sink just looked so plain and needed some molding love.
so Mr. Jones made the molding around the window and it was the perfect finish.!

Doesn't the cabinets look in proportion to the room now.

He made the moldings to go above the pantry as well.

and above the open shelving.

Here is a close up of the window molding.

yes, the window looks grand like the rest of the room.

looking the opposite way.

I am loving the wood tile floors and for Christmas I used my Christmas money to get these wire light covers for the lights above the table. I added the Edison bulbs and I love the look.


one more time. AAAAAH!

and the window


Okay I have promised Mr. Jones I will stop thinking up projects for awhile.
But, I am loving this last project!!

18 comments:
WOW.. WOW... WOW!!! I love the finished look... Trim makes all the difference, doesn't it...You should be proud of all your hard work & dedication to get "mr Jones" on board with the program...
This is one of the most amazing transformations I’ve ever seen! Your kitchen is beautiful!
Modern Kitchen
Kitchen Remodel Planner
Bathroom Remodel
Flooring Installation
Your article continually has got much of really up to date info.
clipping path service
It's good to read such articles. It is very nice that you mention this in the article.
https://proforyou.co.uk/
Thật là cám ơn tác giả và bài viết, mời ghé showroom mình sắm sửa thiết bị vệ sinh TOTO mới nha:
TOTOBM HOT
TIN TỨC
SẢN PHẨM
Nice Article
Play and win in
SahabatQQ
Agen Domino99
For Name Change in LIC Policy contact YourDoorStep
Remarkable! Its really amazing post, I have got much clear idea regarding from
this piece of writing. 파워볼
Excellent post but I was wanting to know if you could write a little more on this subject? I’d be very grateful if you could elaborate a little bit more. Many thanks!야한동영상
Wow! This blog looks exactly like my old one! It’s on a totally different subject but it has pretty much the same layout and design. Superb choice of colors! 건마탑
Wonderful post with amazing article. I was so impressed to yours.카지노
so pleasant assortment never seen such uncommon things kitchen cloths. much obliged for sharing this data.homemade fly trap bait
YourDoorStep is here to provide you Birth Certificate in Noida service at very affordable prices from the comfort of your home. Get it now at very affordable prices
Oh, the data you've shared in this incredible article is just magnificent. I am definitely going to make more use of this data in my future projects. You must continue sharing more data like this with us. 메이저놀이터
percetakan buku online di jakarta
jasa print murah
percetakan murah jakarta
percetakan online jakarta
percetakan Jakarta timur
cetak murah jakarta
cetak online jakarta
digital printing jakarta
print murah jakarta
cetak buku murah di jakarta timur
"I appreciate the author's effort in addressing climate change and advocating for sustainable living. This blog is informative, engaging, and encourages readers to take positive actions. Great job!"
bonchon promo code
"I applaud the author's effort in promoting mental health literacy and awareness. This blog contributes to breaking down stigma and encouraging support-seeking behaviors."
tiff's treats promo code
Thanks for sending over that blog post thingy you found there been looking around myself these past weeks trying to find legit places to save cash online honestly Super Shopper Hub keeps showing up everywhere people talk about their coupon lists and discount codes actually working which is kinda rare these days not gonna lie could be worth checking out if you shop on amazon or whatever helps cut costs without jumping through hoops or anything like that pretty straightforward approach they got going on you know what I mean
Post a Comment