

We are getting ready for Girl's Camp which will be held at the end of June so my crafting has been focused pretty much on that. We decided we will have the theme "Daughters of Helaman". With that in mind we decided that we would focus on Native Americans and some of the traditions and customs that they have. One of the items we decided to make was a medicine bag. From what I have read these bags were used for the spiritual leaders in the tribes and small items were placed inside of the bags that were used for healing and maybe small items that reminded the person of those things that were precious in this life. The person then wore this around their neck and kept it close to their hearts. With that in mind I tried to figure out what a medicine bag would look like. I found that it could be a pouch with a draw string, a bag with a closure of some type, and the bag would have a long enough strap to slip over their head. I had vision in my head what I thought they would look like and drew up a pattern. Then I duplicated it 26 times! ( I am hoping all of the girls will want to come!)

This is how I started, I cut the pattern out of recycled leather and then tried a leather punch but my hand tired quickly so I reverted to the good old brad punch (used for scrap booking). I used straight pins to hold it in place.

I used this hemp cord to sew the two sides together.

I then fringed the edges with my sharp scissors. ( These are now hidden when the grand kids come, I have found they can do some major damage!)

Then to make the leather look a little more authentic, just wet the leather and twist the fringes and then let it dry over night.

You can also do this with the straps.

I then decided I might need some beads on the flap.
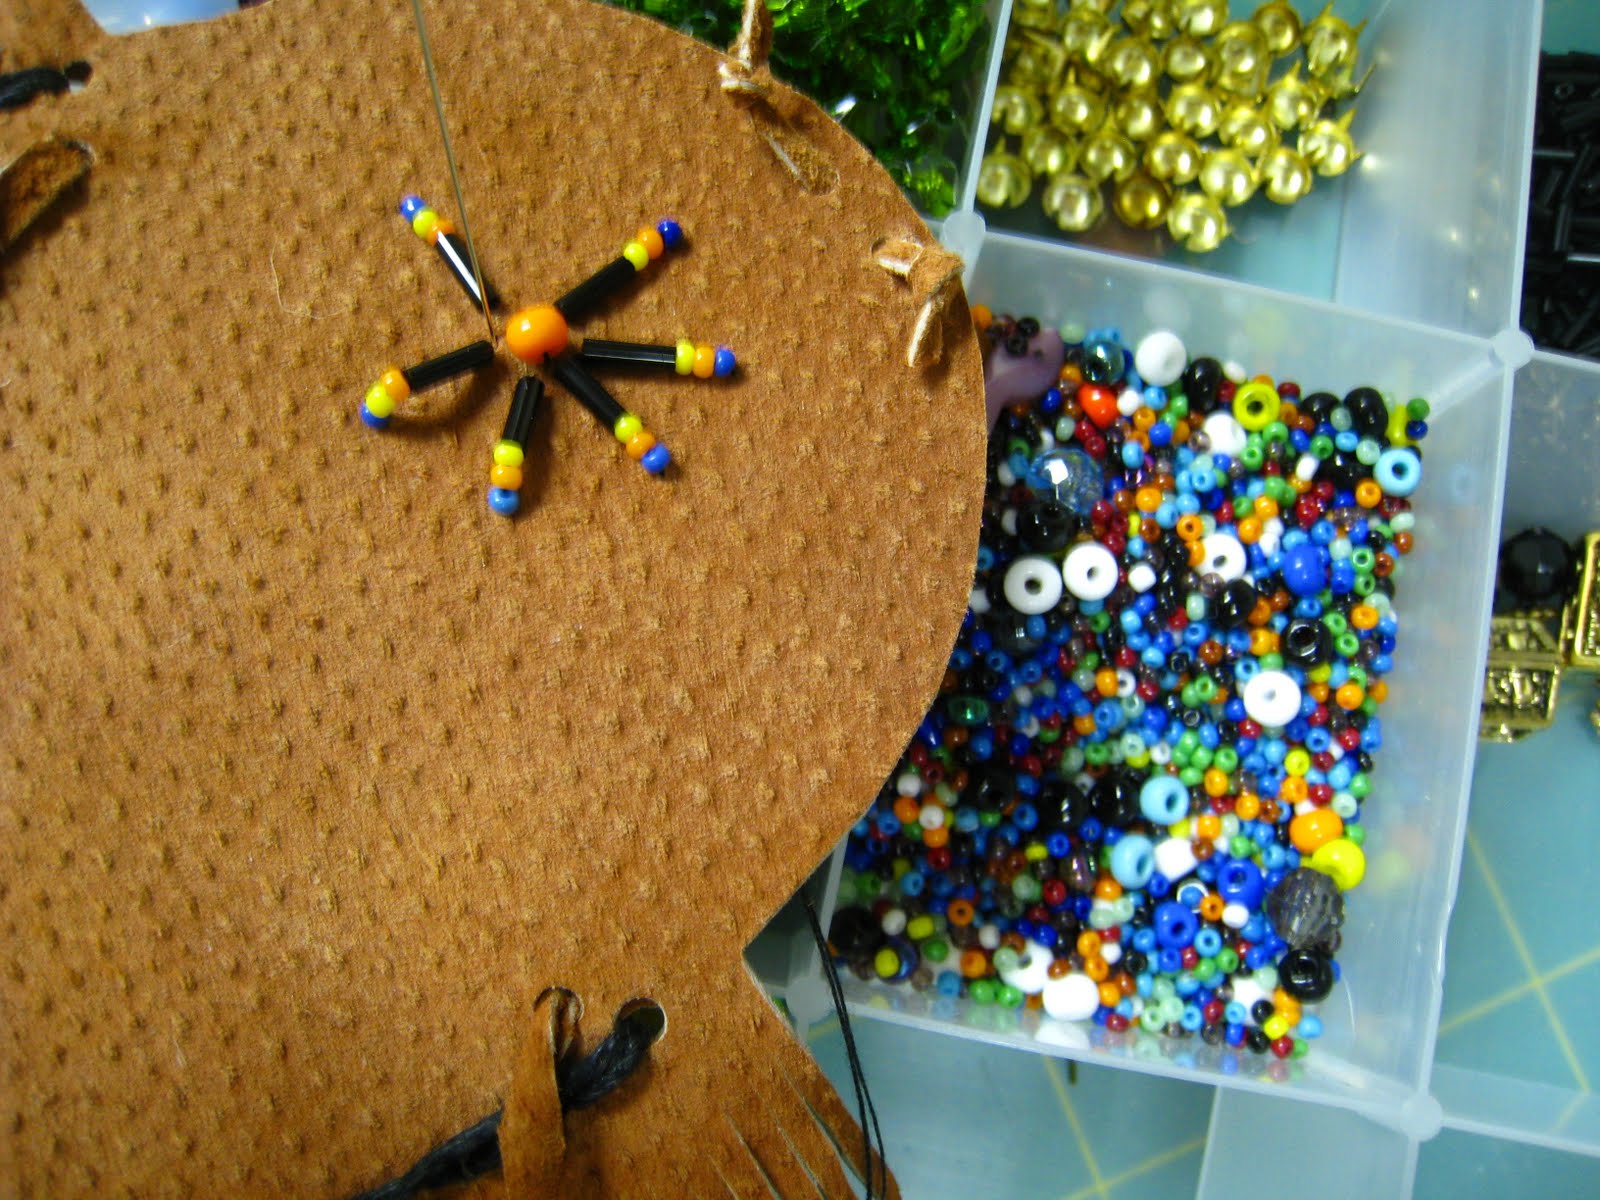
I did learn to use a bead needle, ( it is quite small, in order to fit through the tiny holes of the beads.) A trick to this is to use a safety pin to make the hole through the leather so you can put the bead needle through the hole.

I then made two punch holes for a small loop of leather to make the button hole. I used a bead that looked like a piece of bone for the button.


I had the leather cut out and punched and then each girl made their own. I didn't get a picture of all of them because some of them wanted to take theirs home to put beads on them. While we are at camp we will have the girls put the items in their bags that are special to them.


It was a fun project and the girls are excited for camp. Next week we are planing our menus and passing off some camp requirements. It's going to be a fun summer!
I am linking to Tidy Mom Friday!
4 comments:
very cute ideas you have! thanks for stopping by.
gail
How very cute that is and such sweet models.
I came here via Hooking Up with HOH. Hope you can visit me sometimes over at Pittypat Paperie.
What a great idea. They turned out cute!!
How cute! Love the fantastic idea! I am sure the girls will love having these at girls camp! Thanks for linking up to Hoo's got talent!
Post a Comment