Check out my Etsy shop!

Sunday, April 17, 2011

Some Mother's day ideas...

This week my daughter was in town and she wanted to make this necklace for my Mother's day gift. So we figured out what we needed and went to an antique store to find some vintage jewelry.   We then went to Jo Ann's to buy some cording and clasps.  When we got back home we realized we needed a bigger flower for the necklace.  I had some Sculpey clay and decided it would be easier to make a flower than to go and find the exact one we would need. I made several little round balls and flattened them out to make the petals and just layered them until I had something that resembled a flower.
I then added an antique button to make the impression before I baked it.

I took the button out while it baked in a 275 degree oven for about 35 minutes.

We used 18 inches of drapery cord for the neck lace part and then added some clasps that  wrapped around the cording and bent them with needle nosed pliers. (you have to be careful that the cording does not unravel while doing this, I added a little piece of clear tape to wrap the ends.)

After the flower that was baking cooled I sprayed the flower with ivory Krylon spray paint. Then I used
9001 adhesive to attach the antique button.  I also attache the antique earrings that we found with the same adhesive and let it dry.


After the adhesive has dried , I found that the necklace did not stay in place so I added some felt to the back of the embellishments glued it to the felt and then trimmed the felt so you can't see it. This made all the difference in how straight your necklace will lay.
This one had too much of a space between the earrings so I added another set in between the two.
I will show you that a little later. I also had a silver rope chain and some more earrings that I had bought because of the pretty jewels that were on them


I took apart the earrings and added them to the rope chain.

I used the same adhesive, it is really strong when it dries. 


Didn't it turn out cute!
It was my birthday this week and my daughter made this necklace for me out of beads and black cording. This picture is kind of blurry, Sorry, I will try and get a better view.


She also made this cute shrug from fabric and added the some kind of beads to the center of the flower.

And earrings to match! I wore them today and I felt like the birthday girl!

A close up of the flower.

Here is the full length pic. Thanks for the birthday gift, I love it!

Here is the cording necklace with the added jewelry to the gaps around the larger flower.

Here is the silver cord necklace with "sparklies" on it!


They both turned out so cute and we made one for each other for Mother's day.

They are quite easy to do the longest part in making the necklace is finding the jewels to put on them but I love to go to antique shops so that pretty much was the fun part!

Hooking up here: http://www.houseofhepworths.com/

Saturday, April 9, 2011

My unconventional model

This little boy is the sweetest little baby and he loves to be cuddled and has such a good nature about him. I love his sweet innocence and I love being his grandmother. I hope later in his life he will be forgiving of his crazy grandma.
I have nine grandsons and three granddaughters and all of my granddaughters live far away so when I need a model for my cute girly things I have to travel to their homes, (which is far away for a weekend trip.)


He was at my home this weekend and I had just finished knitting a cute girly hat.

So, I tried it on him! I did leave his little baseball outfit on though.

He made the perfect little model and if  he didn't have his baseball outfit on you would think that he was a cute girly girl.

Well, I can kind of see the boy coming through but he is adorable. (I am a little biased.)

I can't wait to try this hat on one of my granddaughters though with their cute little girly hair and faces.

Just one more picture taking out the navy blue and replacing the color with some light blue from the hat.
I love his little drool.

This hat was quick to make up and I loved the rolled flower on it.

Trevor thanks for being such a good sport and later on in life I promise we won't show this in your wedding video!

Friday, April 1, 2011

Polka dots and Butterflies

(" Oh, no, You have a paint brush in your hand.")
These are the words I have heard from Mr. Jones many times in our married life.
I heard them again this last week. Mr. Jones is someone who likes things to stay where they are and I think he would be content to have the original paint still on the walls for 30 years. I think having things stay as they were keeps him grounded. I am a different story, I am continually changing furniture arrangements, paint color,  finding new ways to do things etc. Mr. Jones always likes the finished project but he usually says, "I like it the way it is." He said that same statement about the bathroom below.  It has been about 5 or 6 years since I painted it last and I don't know what it is but I start getting a thought about painting and I can't get it out of my head! Besides it's just a can of paint and if you don't like it you can always change it.  Well, it was time for a change!
I had done a glazed treatment over these yellow walls.

It is a very small guest bathroom so it won't take long to paint.

These use to be an oak color and I painted them red when I went with the yellow mustard color.

I started by cutting in all of the edges. When we moved into this house there was a small medicine cabinet where the big hole in the wall is and I bought a large mirror and just put it over the hole. (Now, you know my secrets!)

Yep, just a hole in the wall.

Almost finished with the cutting in. Then I had to paint the ceiling, I painted it an ivory color because the yellow ceiling just wasn't doing it for me.

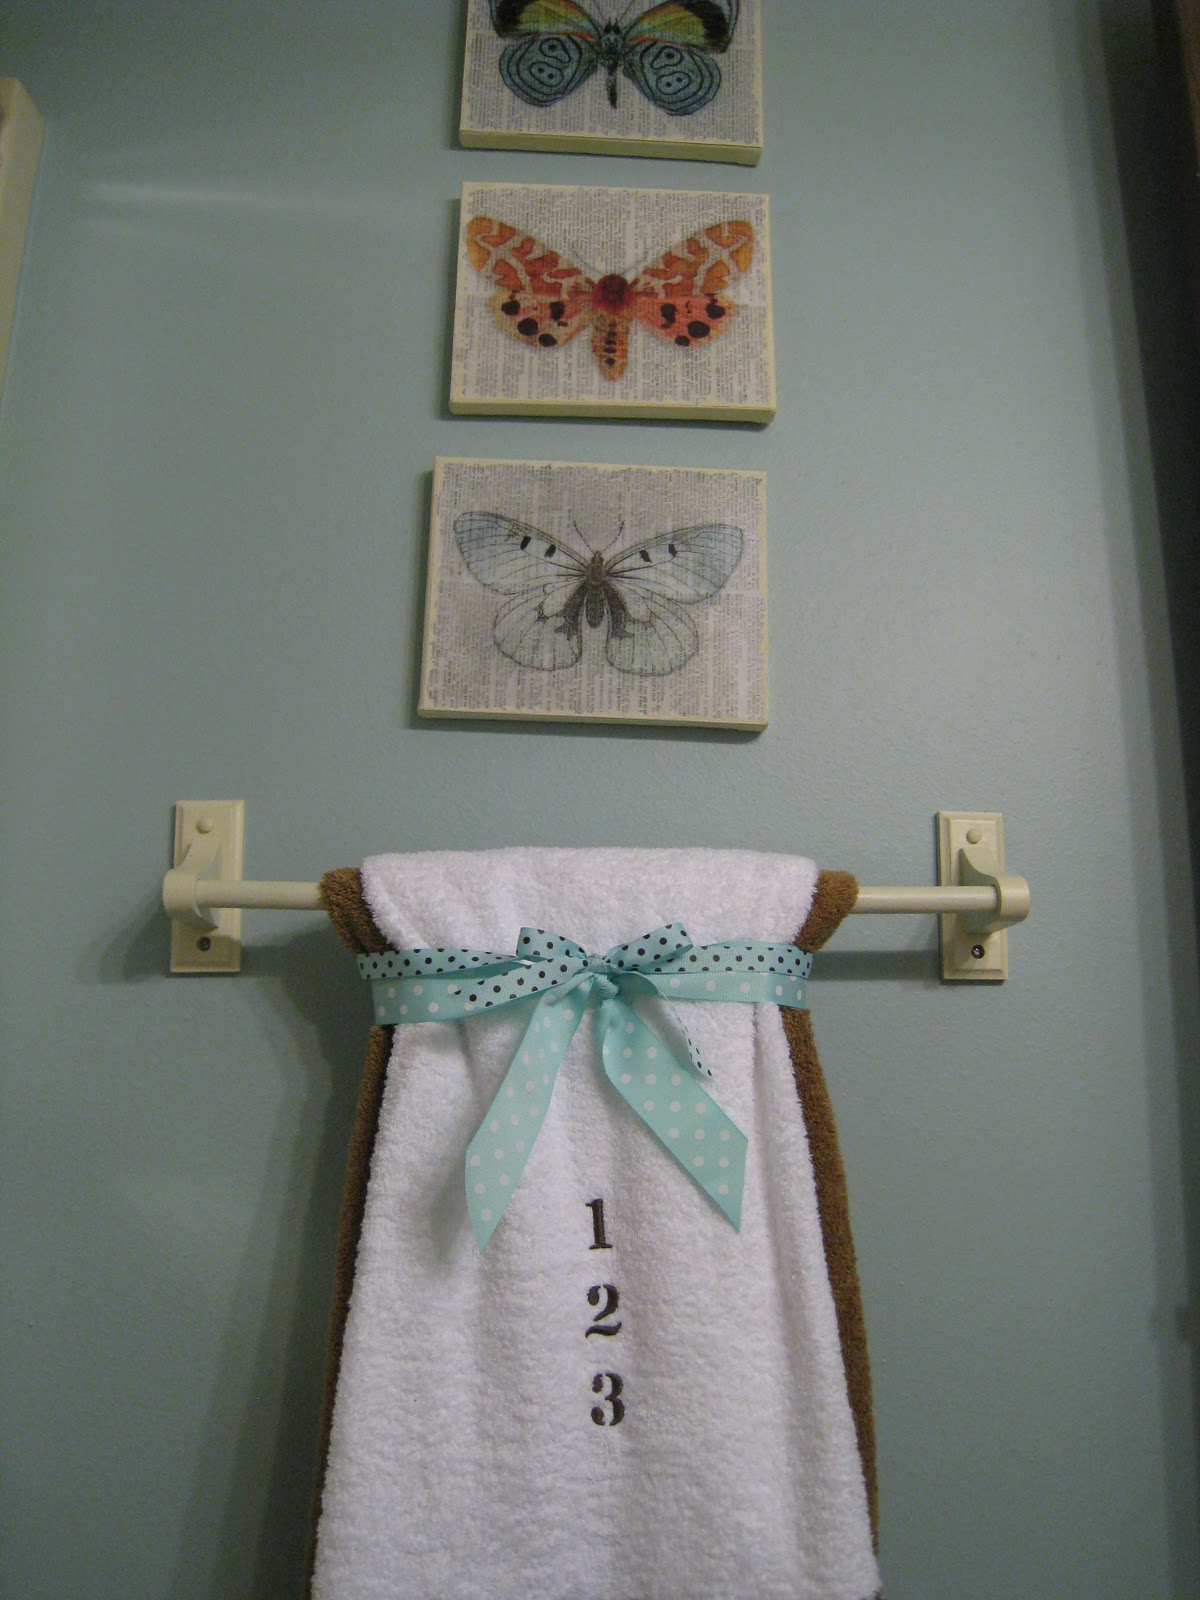
Of, course if you change the paint color then you need to change the accessories. I have these prints that I decided to Mod Podge to some canvas. This was easy you just find a print and cut it to the size of your canvas and start gluing it to the canvas.  After the Mod Podge dries find a color to paint the sides and kind of smudge it up to the top.

I needed some new towels to match, so I found some fabric that would match the paint and made a couple of gathered ruffles to attach to the bottom. I cut my fabric 4 inches wide folded it in half. pressed it with an iron and ran a gathering stitch along the unfinished edge.

I used my embroidery machine to embroider the numbers on the towel.

Pinned into place and sewed away.

Added some more polka dots with the ribbon and the towel was finished!
Oh, and I decided to paint the towel bar instead of getting a new one because the holes in the wall were already the right size for this towel bar.

I did add this top stitch, if you can see it, on the top of the ruffle to keep the ruffle down and to get rid of the raw edges of the fabric on the other side of the ruffle.

I then made a hand towel and added the same size ruffle but decided to sew the ruffle down the middle so I finished the raw edge on this one with a Serge rolled hem.

Added the 1,2,3 and I had a matching set.

Now if you remember from the before picture I had this same towel rack and I really didn't want to buy all new towels so I added a towel cover to the towels I already had. I bought some white terry cloth fabric and added a border of brown and blue fabric and embroidered the numbers on the towel covers and then just wrapped them around the towels I already had.


I added a washcloth banner to the wall above the shower.

A new towel hook for the hand towel.

Painted the cabinets a dark brown. I did a light coat because I kind of liked the red showing through the paint.

Almost looks like a dark cherry.

Here is a close up of the towel covers.

Added some more polka dots to the wash cloths.

And some more polka dots! I just used some ribbon to attach the banner to the wall.

Here are my butterfly prints that are on an old dictionary page.

See how the paint from the sides of the canvas are smudged up onto the top.


Wow, I am exhausted! I think that is why I only get the paint bug every 5-6 years.
I love the new color though and it was all worth it!

LinkWithin

Related Posts with Thumbnails